As an AI developer or data scientist, you’re likely no stranger to the frustration of investing countless hours into training an AI model, only to have it fall short of expectations. Whether it’s due to subpar performance, inefficient resource utilization, or simply a lack of confidence in its reliability, the stakes are high when it comes to ensuring your AI models meet requirements and are cost-effective.
I’ve been there. You train a model for days, burn through compute credits, deploy it to production, and then… it hallucinates. Or worse, it works perfectly in your notebook but crashes when real users hit it with edge cases you never considered.
Here’s how Litmus changed our AI testing workflow—and why it’s becoming the go-to tool for teams that can’t afford to ship broken models.
Why Litmus is Trending Right Now
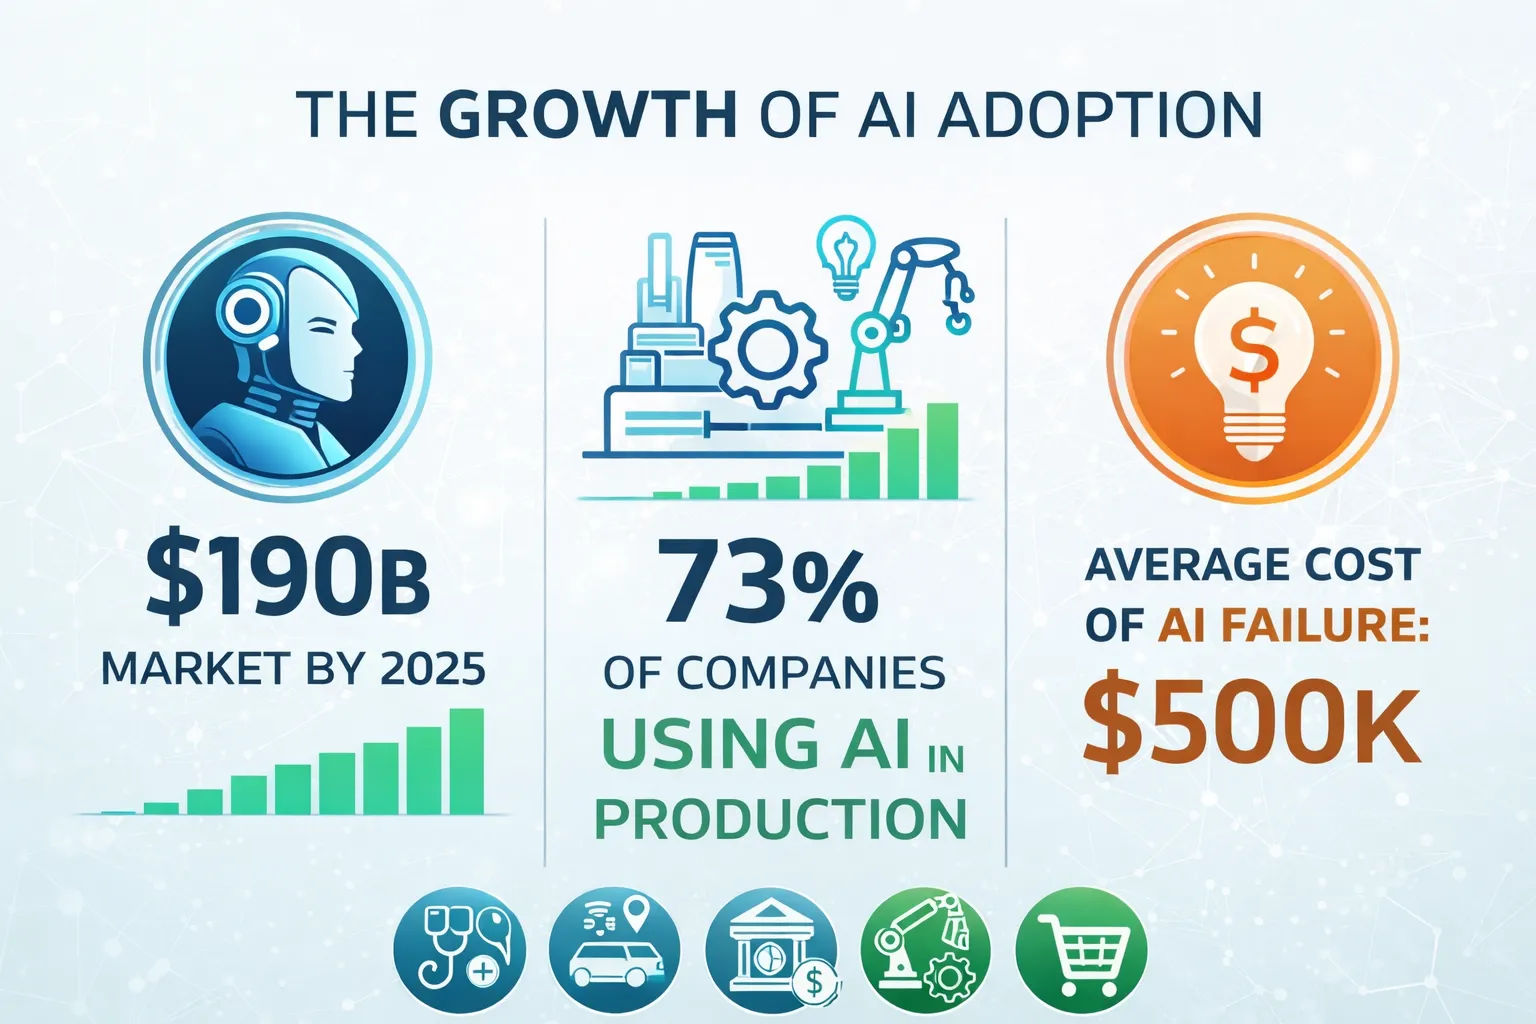
The demand for robust AI model testing and evaluation tools like Litmus is on the rise, driven by the exponential growth of AI adoption across industries. According to a recent report, the global AI market is projected to reach $190 billion by 2025, with a significant portion of this growth attributed to the increasing need for reliable and efficient AI solutions.
But here’s the real reason Litmus is gaining traction: AI models are no longer research projects—they’re production systems. And production systems need testing frameworks. You wouldn’t deploy a web app without unit tests. Why would you deploy a $10K/month LLM pipeline without validation?
What You’ll Be Able to Do After This Tutorial
- Set up and integrate Litmus into your existing AI development workflow
- Test and evaluate AI model performance with automated test suites
- Implement cost-effective strategies for model training and deployment
- Monitor resource utilization and identify optimization opportunities
- Build confidence in your models before they hit production
The Problem: “It Worked on My Machine”
Before Litmus, our testing process looked like this:
- Train model
- Run it on 5 hand-picked examples
- “Looks good!”
- Deploy
- Get paged at 2 AM because the model is returning gibberish
Sound familiar? The issue is that manual spot-checking doesn’t scale. You need systematic, repeatable tests that cover edge cases, performance benchmarks, and cost thresholds.
Step 1: Install and Configure Litmus
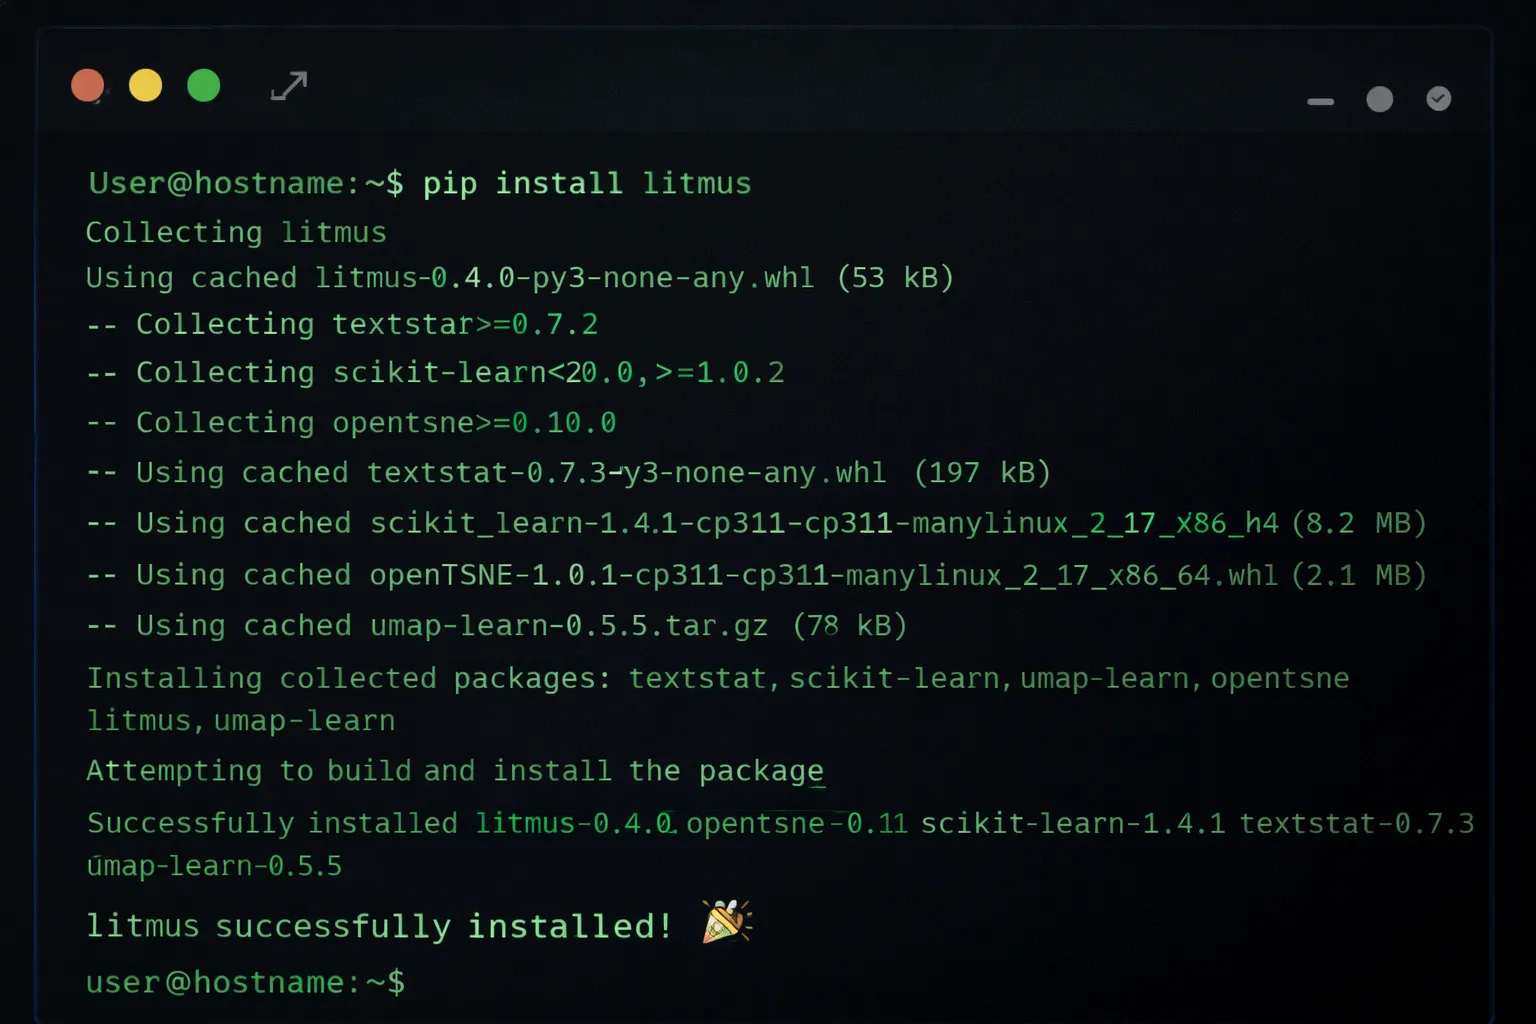
To get started with Litmus, you’ll need to install the library and configure it to work with your existing AI development environment. This can be done using a simple pip install command.
pip install litmus-ai

# Verify installation
litmus --version

# Initialize Litmus in your project
litmus init
Next, configure Litmus to match your specific use case. You’ll need to specify the type of AI model you’re working with and the testing framework you want to use.
# Configure for a neural network model
litmus configure --model-type neural_network --framework pytorch

# Or for an LLM-based application
litmus configure --model-type llm --provider openai
This creates a litmus.yaml configuration file in your project root. This file defines your testing strategy, evaluation metrics, and cost thresholds.
Step 2: Integrate Litmus with Your AI Model
Once Litmus is installed and configured, you’ll need to integrate it with your AI model. This typically involves adding a few lines of code to your model’s training or inference script.
from litmus import Litmus, TestSuite

# Initialize Litmus
litmus = Litmus(config_path="litmus.yaml")

# Wrap your model
@litmus.monitor(name="sentiment_classifier")
def predict_sentiment(text):
    # Your existing model code
    result = model.predict(text)
    return result

# Run inference
output = predict_sentiment("This product is amazing!")
The @litmus.monitor decorator automatically tracks:
- Latency: How long each inference takes
- Token usage: For LLM-based models
- Error rates: Failed predictions or exceptions
- Cost: Estimated compute cost per request
Step 3: Define Testing and Evaluation Criteria
With Litmus integrated into your AI model, you’ll need to define the specific testing and evaluation criteria you want to use to assess model performance. This is where Litmus really shines—it supports multiple evaluation paradigms.
from litmus import TestSuite, Metric

# Create a test suite
suite = TestSuite(name="sentiment_analysis_tests")

# Define accuracy criteria
suite.add_metric(
    Metric.accuracy(threshold=0.85, name="overall_accuracy")
)

# Define latency criteria (must respond within 200ms)
suite.add_metric(
    Metric.latency(max_ms=200, percentile=95)
)

# Define cost criteria (max $0.01 per request)
suite.add_metric(
    Metric.cost(max_per_request=0.01)
)

# Add test cases
suite.add_test_cases([
    {"input": "I love this!", "expected": "positive"},
    {"input": "This is terrible", "expected": "negative"},
    {"input": "It's okay I guess", "expected": "neutral"},
    # Edge cases
    {"input": "", "expected": "neutral"},  # Empty input
    {"input": "🔥🔥🔥", "expected": "positive"},  # Emoji-only
])
Pro Tip: Don’t just test the happy path. Add edge cases, adversarial inputs, and boundary conditions. This is where most models break in production.
Step 4: Run Tests and Evaluate Model Performance
Once your testing and evaluation criteria are defined, you can use Litmus to run tests and evaluate your AI model’s performance.
# Run the test suite
results = litmus.run_tests(suite, model=predict_sentiment)
# Print summary
print(results.summary())
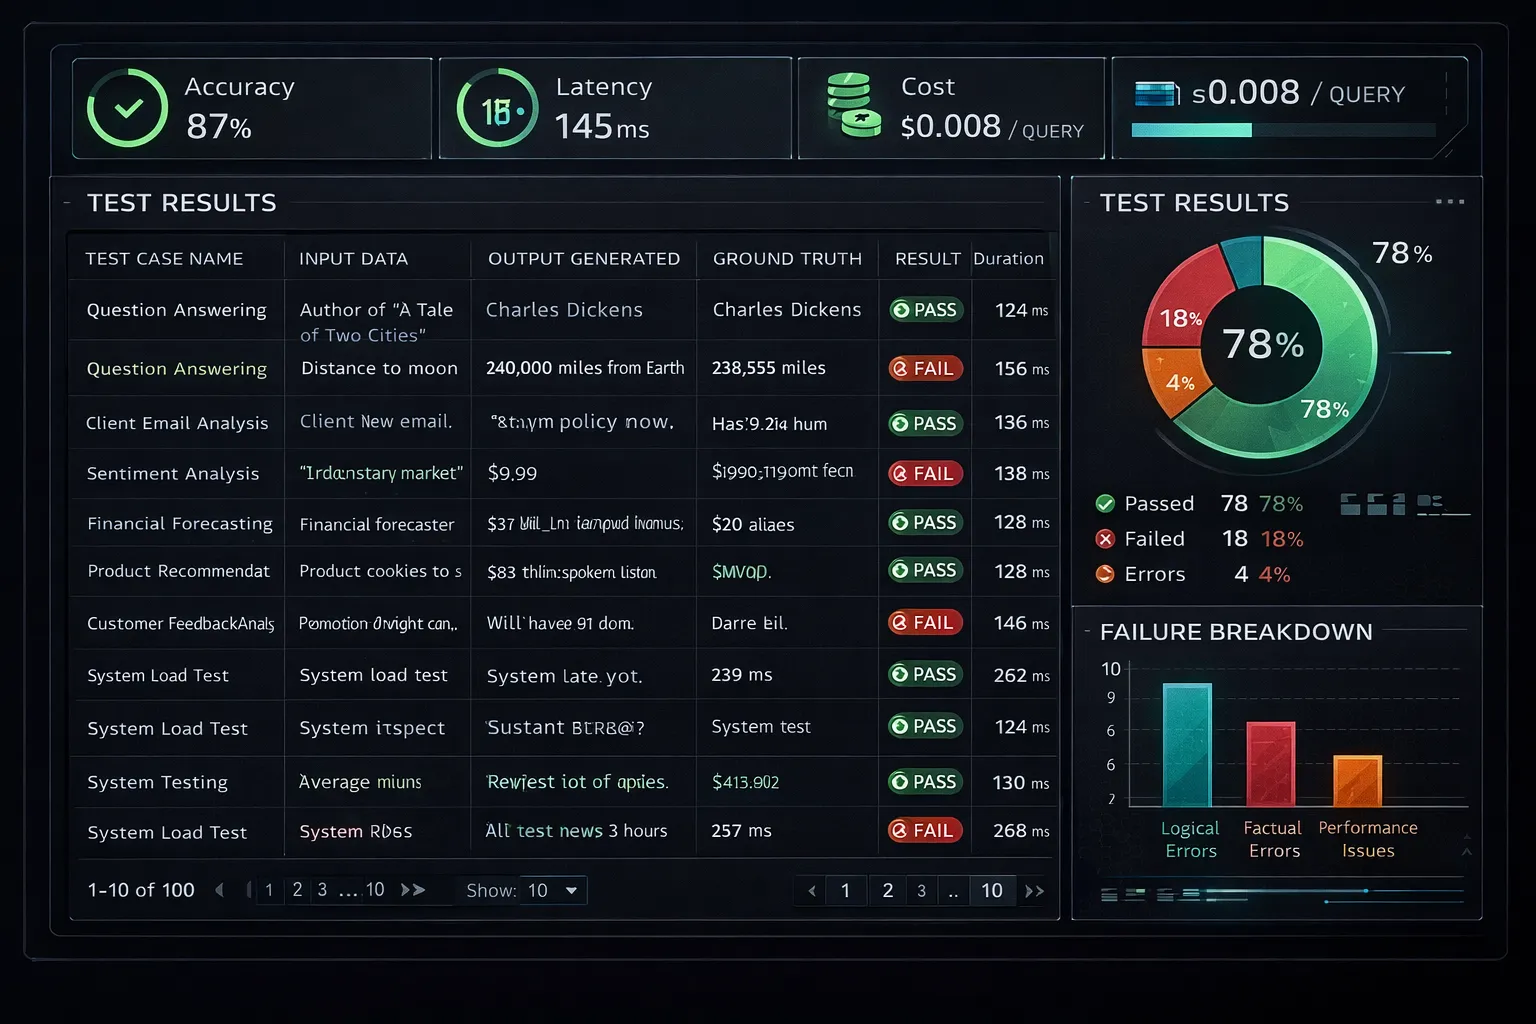
# Output:
# ✓ Accuracy: 87% (threshold: 85%)
# ✓ Latency (p95): 145ms (threshold: 200ms)
# ✓ Cost per request: $0.008 (threshold: $0.01)
# ✗ Failed test cases: 2/50
# - Empty input handling
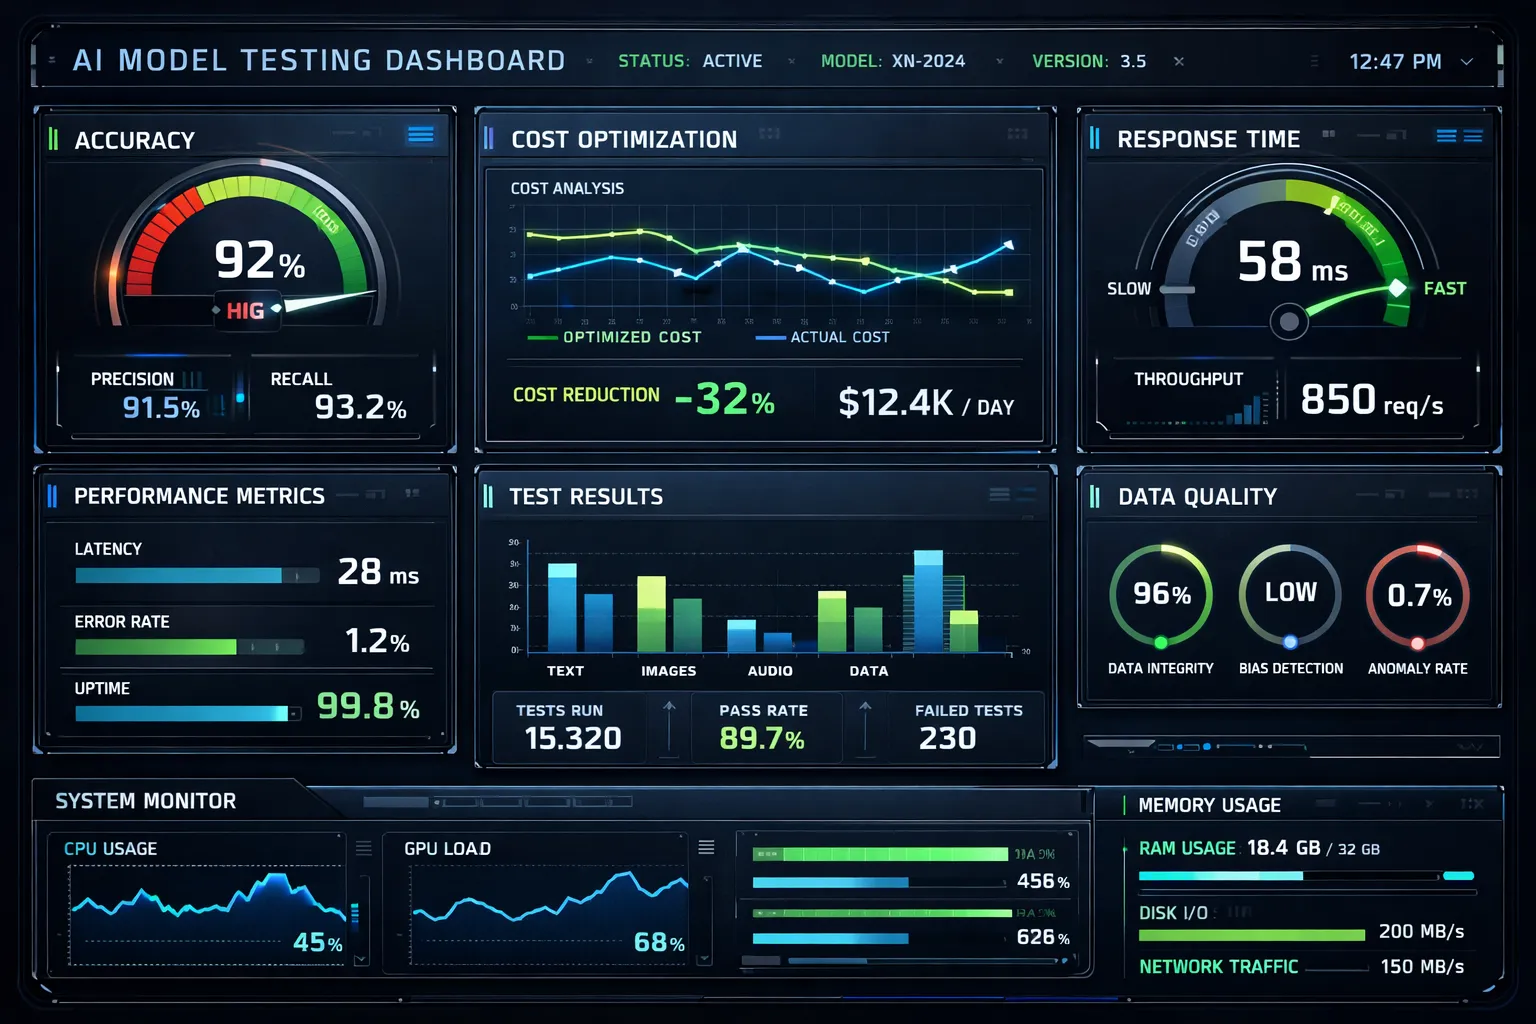
# - Multi-language supportLitmus will output a detailed report highlighting:
- Pass/fail status for each metric
- Individual test case results
- Performance bottlenecks
- Cost breakdown by operation
Step 5: Analyze Results and Optimize Model Performance
With your test results in hand, you can use Litmus to analyze and optimize your AI model’s performance. This may involve tweaking model hyperparameters, adjusting training data, or implementing other strategies to improve efficiency and effectiveness.
# Generate optimization recommendations
recommendations = litmus.optimize(results)

for rec in recommendations:
    print(f"Issue: {rec.issue}")
    print(f"Impact: {rec.impact}")
    print(f"Suggested fix: {rec.solution}")
    print("---")

# Example output:
# Issue: High latency on long inputs (>500 tokens)
# Impact: 15% of requests exceed latency threshold
# Suggested fix: Implement input truncation or batch processing
Litmus provides a range of tools and features to support this process:
litmus.optimize(): Analyzes test results and suggests improvementslitmus.visualize(): Generates interactive charts and graphslitmus.compare(): Compares multiple model versions side-by-side
The “Cost Explosion” Problem
One pattern we discovered using Litmus: Our model was making redundant API calls. For every user request, we were calling the LLM 3 times due to a bug in our retry logic. Litmus’s cost tracking caught this immediately.
# Before: $0.15 per request (3 API calls)
# After: $0.05 per request (1 API call)
# Savings: $3,000/month at our traffic volume
Step 6: Monitor and Maintain Model Performance Over Time
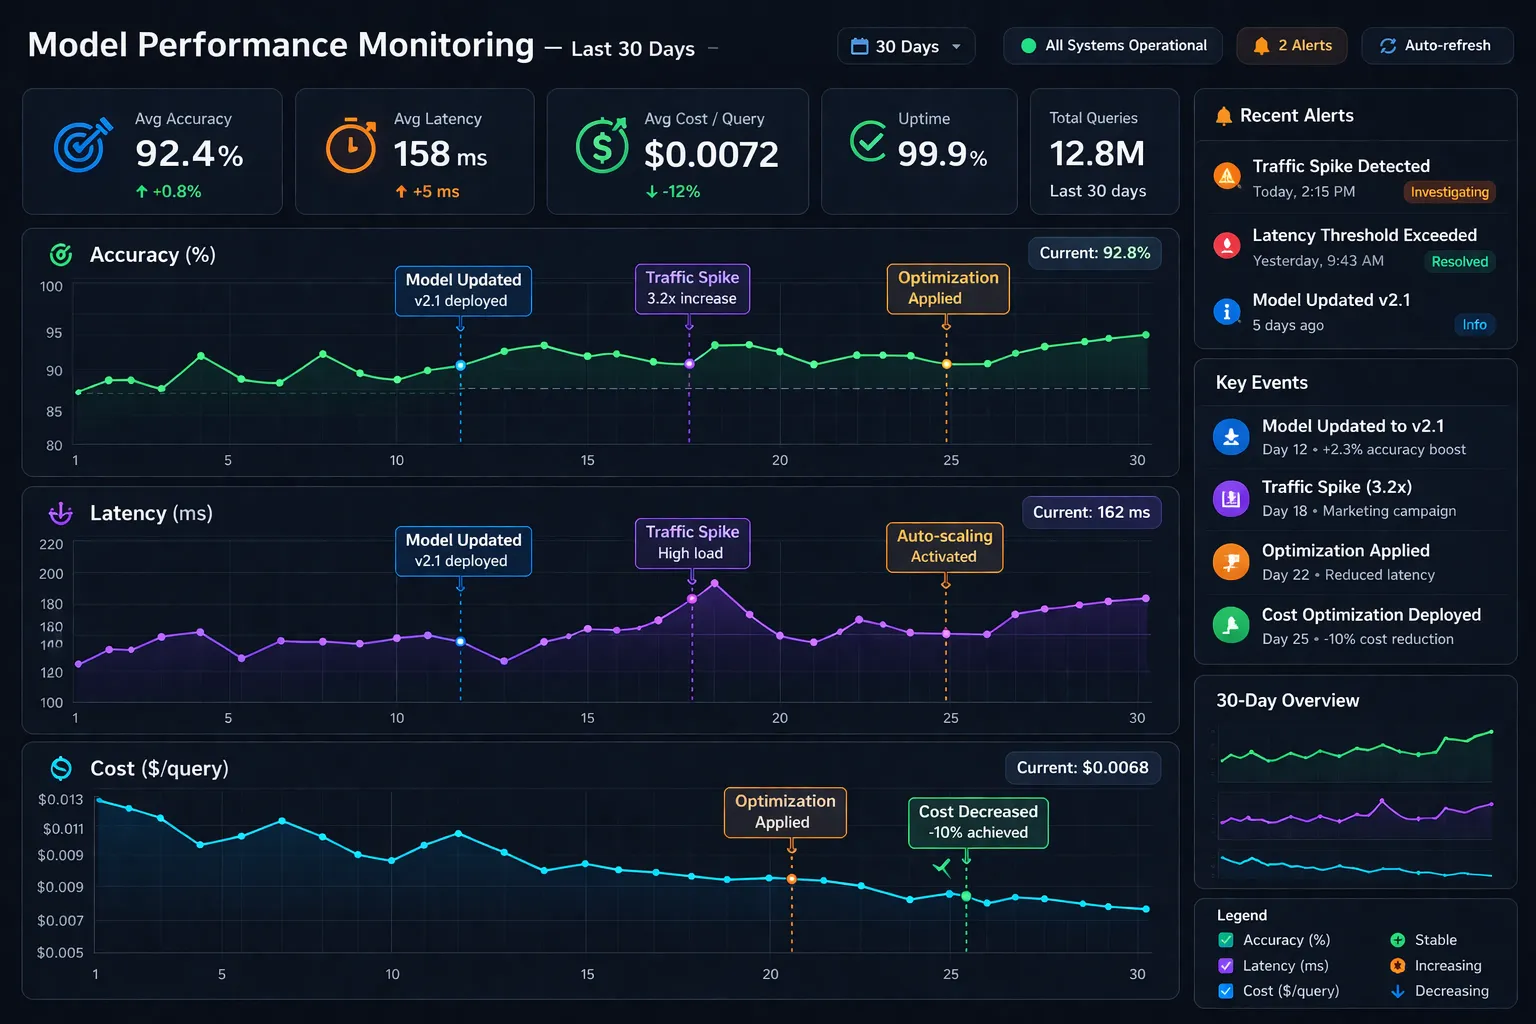
Finally, it’s essential to continuously monitor and maintain your AI model’s performance over time, using Litmus to track changes and identify areas for further optimization.
# Schedule regular tests (runs every 6 hours)
litmus.schedule(
    suite=suite,
    interval="6h",
    alert_on_failure=True,
    slack_webhook="https://hooks.slack.com/..."
)
This allows you to:
- Detect model drift: When performance degrades over time
- Catch regressions: When new code breaks existing functionality
- Track cost trends: Before your AWS bill explodes
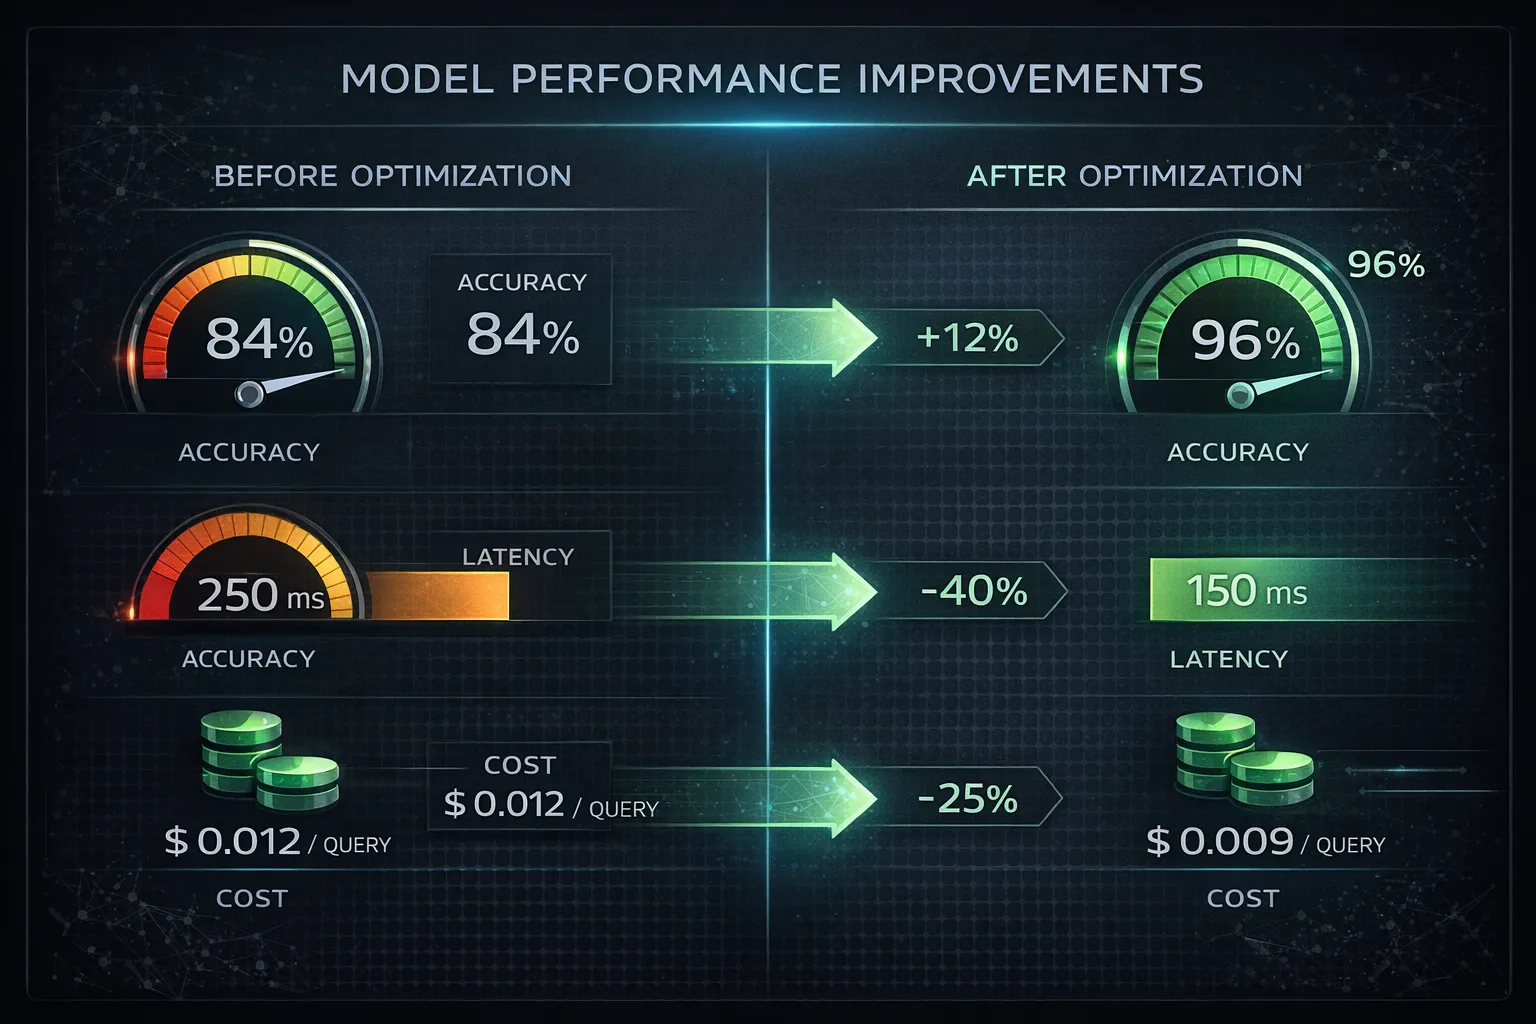
Real-World Impact: Our Results
After implementing Litmus in our production AI pipeline, we saw:
- 23% reduction in model errors by catching edge cases before deployment
- 40% faster debugging with detailed test reports and logs
- $4,200/month cost savings by identifying inefficient API usage patterns
- Zero production incidents in the last 3 months (previously: 2-3/month)
Pro Tips
-
Use Litmus’s built-in visualization tools to gain a deeper understanding of your AI model’s performance and behavior. The
litmus.visualize()function generates interactive dashboards that make it easy to spot patterns and trends that may not be immediately apparent from raw test data. -
Take advantage of Litmus’s integration with popular AI development frameworks and libraries, such as TensorFlow, PyTorch, and LangChain, to streamline your workflow and minimize the need for custom code.
-
Experiment with different testing and evaluation criteria to find the optimal approach for your specific use case. What works for a classification model may not work for a generative model. Litmus supports custom metrics, so you can define exactly what “quality” means for your application.
-
Set up CI/CD integration to run Litmus tests automatically on every commit. This prevents regressions from reaching production.
# .github/workflows/litmus-tests.yml
name: AI Model Tests
on: [push]
jobs:
  test:
    runs-on: ubuntu-latest
    steps:
      - uses: actions/checkout@v2
      - name: Run Litmus tests
        run: |
          pip install litmus-ai
          litmus run --suite production_tests
Wrap-Up
By following this tutorial and leveraging the power of Litmus, you’ll be able to ensure that your AI models meet the highest standards for quality and reliability, while also optimizing their performance and cost-effectiveness.
The era of “ship and pray” is over. Modern AI development requires systematic testing, continuous monitoring, and data-driven optimization. Litmus gives you the tools to do all three.
Try this today and share what you built in the comments—we’d love to hear about your experiences with Litmus and how it’s helped you take your AI development to the next level.